Introduction
If your running your own OpenBSD router at home, you're in luck, everything works great with minimal configuration from your side. But if you're like the average nerd, you're probably running the DD-WRT on your home WiFi/Router box.
Unfortunately DD-WRT does and doesn't support IPv6. Most of the builds have IPv6 built-in, but there are no graphical setup of IPv6, and not even the ping6 or traceroute6 utilities in the console. So you have to configure IPv6 for DD-WRT totally in the dark.
Luckily some frustrated users added some useful information at: http://www.dd-wrt.com/wiki/index.php/IPv6
But there are many different ways to configure IPv6 on DD-WRT, and many of them fail. This post is my config, which applies to my specific setup, in hope that it might be useful for someone. If you didn't already read up on what IPv6 and 6to4 is, you should stop here, and go wiki it.
My setup includes the following:
- 6to4 tunnel from the awesome folk at Hurricane Electrics tunnelbroker.net service
- A Cisco/Linksys WRT-320N
- DD-WRT 24 K2.6 build (eko beta build)
- Please note that I'm using the kernel 2.6 build, since the WRT 320N is supported.
- The initial flash of the WRT 320N has do be done with a special build
After enabling IPv6 under "Administration" -> "Management", the you must activate the config by entering it under "Administration" -> "Commands", and save it as "startup".
sleep 5
WANIP=$(ip -4 addr show dev vlan2 | awk '/inet / {print $2}' | cut -d/ -f1)
echo "External IP:" $WANIP > /tmp/startup.debug
if [ -n $WANIP ]
then
echo "configuring tunnel" >> /tmp/startup.debug

# The following commands are straight from HE's website
ip tunnel add he-ipv6 mode sit remote 216.66.84.46 local $WANIP ttl 64
ip link set he-ipv6 up
ip addr add 2001:470:1f14:1446::2/64 dev he-ipv6
ip route add ::/0 dev he-ipv6

# Set IPv6 addr for br0
ip -6 addr add 2001:470:1f15:1446::1/64 dev br0

# Enable IPv6 forwarding
echo 1 > /proc/sys/net/ipv6/conf/all/forwarding

# Start radvd
radvd -C /tmp/radvd.conf &
fi
Please note that since I'm using the WRT-320N, my WAN interface is vlan2 instead of the usual vlan1. Also "216.66.84.46", "2001:470:1f14:1446::2" and "2001:470:1f15:1446::1" is my "Server IPv4 Address", "Client IPv6 Address" and "Routed /64" respectively from my HE 6to4 tunnel. Yours will be different.
You also have to enable radvd under "Administration" -> "Management" and insert a configuration. The following minimal configuration is sufficient for me:
interface br0
 {
 AdvSendAdvert on;
 prefix 2001:470:1f15:1446::/64
   {
   };
 };
The "2001:470:1f15:1446::/64" the my routed prefix from HE, adjust to your prefix.
I also added: "iptables -I INPUT 2 -p ipv6 -i vlan2 -j ACCEPT"
To my firewall commands (note the vlan2 for wan interface), as it was suggested in the wiki page.
Final thoughts and gotchas.
After all this, reboot your router (again) and cross your fingers. If it doesn't work you can log into the router via SSH or Telnet and mess with the ip command.
Some things that confused me from the wiki pages.
- ttl should be 64, not 255 as you get in the HE example configs
- your routed subnet should only be added to the br0
- sometimes the wan interface is vlan1, othertimes vlan2
- radvd may or may not start on it's own. Add it to the commands to be sure.
- the ip command often returns nothing on erroneous input, so double check that the command did something useful when messing with it.
- http://ipv6.google.com/ - wee. google. now with ipv6
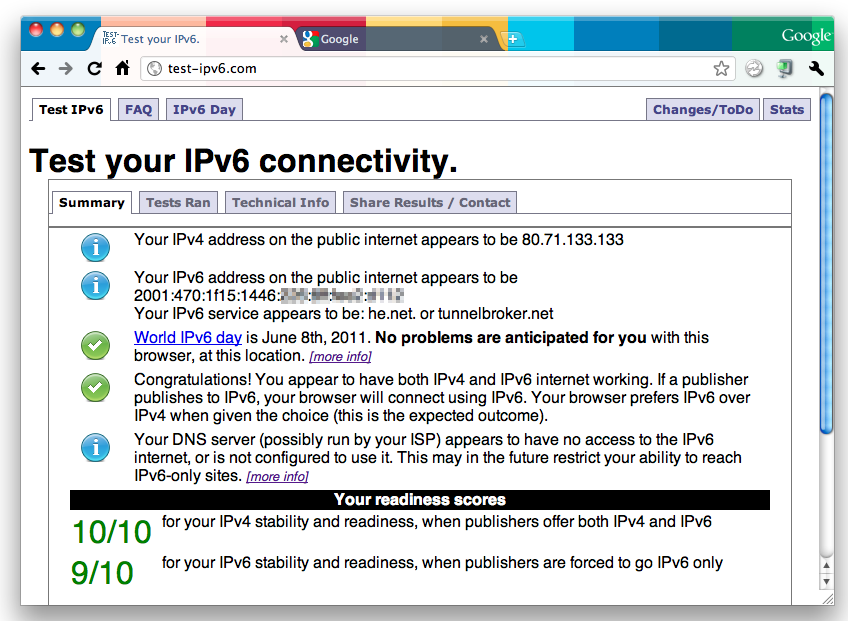
- http://test-ipv6.com/ - enjoy your test scores, and brag to your (nerd) friends
- http://www.kame.net/ - watch the turtle dance (only dances for IPv6 users)


